Conclusion

This module has been at times the most frustrating and difficult I have so far taken but I think has produced the work I am most pleased with due to the effort I have had to put into it. The hugely steep learning curve that comes with 3DS Max has been very difficult to overcome and I have found myself watching endless youtube tutorials in an attempt learn how to use the program. With no prior 3D animation knowledge and limited 3D modeling knowledge I knew the second part of this module was going to be difficult so I took a conscious decision to make my models as simple as possible. This was in an attempt to make the animation as easy as possible. I used much more basic materials (than in the first part of the module) that would deform more naturally on my character than more complex materials.

However I made the mistake of making the limbs on my characters far too thick. Due to their thickness their range of movement was very limited. My inexperience animating was the reason I made this mistake. It proved to be my biggest problem throughout the animation process and something I would definitely change if I were to do the module again.

I used 3 lights for my scene, 1 omni light, 1 spot and 1 skylight. The skylight gives a very natural effect with great shadows but dramatically increases the render time. I decided to stick with it because I knew I would regret it if I had removed it. The spotlight emitting from the lamp is particularly effective in lighting the scene and was very happy with the look it gave.

As I have previously highlighted I made the arms and legs too thick to achieve a good range of motion that limited my animation. I think I managed to overcome this problem quite well in the end. The skinning stage was quite frustrating with random vertices moving with bones for no apparent reason but when it finally went according to plan it was a good feeling seeing the models come to life.

I used a variety of different camera shots mixing long shots, aerial shots, close ups and a point of view shot.   Having the freedom of getting any shot I wanted was something I enjoyed, im sure it will make going back to actual video producing feel much more restrictive.

I think the weakest area of the animation was the sound. I learnt finding sounds that were appropriate was very difficult. Amongst others I ended up using two songs from Toy Story, people often said that my character and scene reminded them of toy story so I decided to continue with these connotations by using the songs from the films. I wanted to give the idea that my animation could fit into a scene of Toy Story.

I have learnt the basics of animating in 3D during this module and feel that I have gained a good foundation that I can build on in future projects. I have enjoyed gaining the new skills and pleased with the work I have produced.
Final Animation


So after rendering around 1600 frames at between 1:30 - 2 minutes per frame the animation is finally at a point where im happy with it.

Editing in Premiere Pro


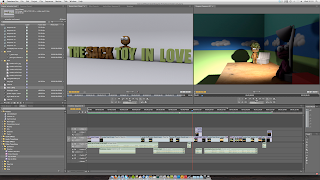
Once all the parts of the animation were rendered I was ready to edit them together in Premiere Pro. It was a nice feeling going back to a program I was very familiar with after the frustrating struggles with 3DS Max. I started by importing all the rendered scenes, both the .mov’s and the bitmap still’s that I had rendered. I trimmed the clips to required lengths and dropped them into the timeline.

After I had my moving clips where I roughly wanted to be I then placed the bitmaps on the timeline. I used bitmaps for when the animation was still because there is no point rendering still motion. By using bitmaps I was using a lossless image type so the stills would not be noticed. I then went back to max and created an intro still which I thought to be much more effective than a simple photoshop graphic intro.


I used ‘fade to black’ for my transitions where I have used them. I used a fade to black with a black screen for a few seconds in order to show a period of time passing after the character is sewing his heart.

I then created a thought cloud in photoshop to show my character having an idea. I can create this directly from Premiere Pro by selecting File > New > Photoshop file. This opens up photoshop with a canvas the perfect size for the video. This also allows me to edit the file and the changes are made in premiere when the file is saved which is a good example or Adobe premiere pro & photoshop integration.


Finally I gathered sounds for my animation. This was an area that I had neglected prior to this point. I searched through a huge range of websites in trying to find suitable sounds. This was very frustrating at such a late stage because the perfect sound was never to be found. If I had allowed more time I would have liked to record my own sounds. I set keyframes in the effects control window for the sound and lowered the volume of keyframes to make the sounds transition. 


I then exported the video. I exported using the H.264 format which has increasingly become the standard for web video because of its very good compromise between quality and file size. I set the target bitrate to 15 which would again give a high quality video and reasonable file size. 


Finally I uploaded the video to youtube to upload to this blog. 

Rendering Problem

The Rim of the hat was not rendering at all. I eventually found that the material needed to be set to 2-sided to fix this problem.


Rendering

After animating I had 11 different files that would require rendering. I was rendering after I finished each scene to make sure I didn't run out of time. I decided to render at a 16:9 resolution of 1067 x 600. I chose this format to give the animation a more cinematic look. My scene had 1 skylight and 1 omni light, I set the ‘rays per sample’ for the skylight to 12 which was a good compromise between quality and render time. Depending on the specific scene I was rendering each scene between 1:30 and 2 minutes. I did make a few mistakes whilst rendering, I had to re-render a scene because I forgot to turn on the omni light which was highly frustrating. I also had to re-render a scene due to me not hiding the biped which was poking out at the feet. From these errors I made sure I checked everything before hitting render and leaving it to run. For times when the animation is still I rendered a bitmap image so as not to waste time rendering still frames. 


Animating

Once I had completed modeling the scene and skinning the characters I was ready to start the animation. Having no prior experience animating in 3D in any form I made sure completed many of the tutorials and watched some appropriate videos on youtube.

The first part of the animation involved the character running up to the chest of draws and climbing up. The initial sequence had the character running and hitting a ball which rolled away, then jumping over a (aesops fables) book then walking up to the draws. I created the run/jump/walk sequence in footstep mode then converted the keyframes to freeform animation so I could then animate the climb. Getting the climb to look natural was the difficult part whilst also trying not to have the limbs intersecting with the drawers. Because the next scene involved more walking I had to save the scene and copy it because if I converted the keyframes back to footsteps mode I would loose the climbing animation. When I opened my copy I deleted all the previous keyframes which allowed me to enter footsteps mode and proceed with similar steps for the next part of the animation. 


My character interacts with 4 different objects throughout the animation and I used different methods to achieve this. For the hat I set the start keyframe with it in the box and the end keyframe with it on the characters head. I then went through and set the keyframes in-between to make the hat appear in the hand. I was going to attach the hat to the hand by using a dummy but the animation looked convincing using the method I used so I decided to use the dummies later on. When the animation cuts to a close-up the character leans forward again into the box and the hat is still on his head. To do this I created a new file and attached the hat to the head using the select and link tool, I had to create a new file to do this because the hat is attached from the beginning of the scene which would have caused the prior animation to stop working. 

When animating the part with the heart & sewing needle I used dummies to make the objects move with the hand. I set the link constraint for the objects and added the links. Which connected the objects to the hands and allowed them to move together. 

*to be updated*