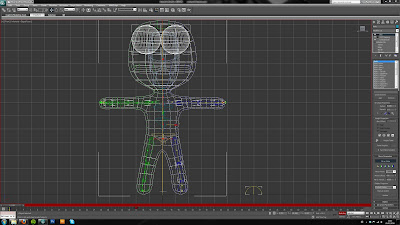
Learning to Walk

After skinning my character I could now start to experiment with the footsteps mode. My initial thoughts on the footstep was that compared to most other functions of 3DS Max it was relatively easy to use and implement. Getting my charcter to walk, run and jump was quick to achieve, the difficult part came when I wanted to mix footstep mode with normal freeform. I soon realised that I had to convert the footstep keyframes into freefrom keyframes, this however meant once I converted the keyframes i could not go back and edit the footsteps easily. This also meant that my animation would have to be in more seperate parts when mixing the different parts of the animation (i.e walk - do something - walk - do something - walk)

Sack Model & Scene Merge


I decided to merge the model & scene to ensure that the models were in correct proportion to each other. I did however find the problem that when importing the chracter to the scene its materials werent automatically put into the materials libary. To overcome this I exported the material libary from the character and imported the libary seperately through the materials window. Now I must finish the scene & copy/modify the model to create the second female character. Once that is complete I can commence animation.

Sack Character development 2

My sack model below is now almost complete. The standing pose shows the skinning to have turned out well however in the sitting pose a few problems appeared. The arms have a few sharp points when moved to their maximum amount of avaliable movement also something on the left arm is effecting one vertex on the lower part of the head which can be seen in the image below. These problems only require small modifications to the skinning. I am quite happy how the model/biped/skinning has turned out and am now confident enough that the model will work well when it comes to animating it. I do however have the problem that becuase of the nature of my character there is not the same level of movement in the limbs that a normal human shape would have. This is due to the 'chunky' nature of the body, hopefully it wont cause me too much trouble in the animating phase.

To create the background & lighting for these renders I used this tutorial


Gun Animation

Tutorial excercise.

Model Skinning Development 1

After completing the models body (exluding the eyes) I inserted a biped and began skinning. I could certainly foresee problems with the skinning phase so I wanted to get this part done as soon as possible. Initially I inserted the biped which didnt require much modifying. I removed the fingers & toes from the biped as my character had no need for them, I also removed a spine link.


After watching all the appropriate tutorial videos provided I then started skinning the model using the skin modifier. Again becuase of the simple nature of my model the process was not too difficult. Once I set the initial weights and started to test the movement I was pleasently surprised with the deformation & movement. The further tweaks to get the deformations to the point I was happy with however took much longer.

Scene Development 1

In order to get the scale of my character model correct I created the major parts of the scene. I started by creating the chest of draws which would act as the main platform where the action will take place. The drawers were created by making a box and simply extruding polygons. I used a wooden image diffuse & applied the same image for the bump to give it a realistic wooden look. I applied a UVW map which allowed me to manipulate the material further. I also created the drawer handles and made a golden material for them. 


The lamp provides a visual source for the light & creates an effective lighting style. I created the lamp by starting with a cylinder and extruding out from the cap, the angles were created by using the 'hinge from edge' tool.  Finally I created a cone and extruded inwards to create a space for the light bulb. For the bulb I set the material as self illuminating which gave the effect that the light was on. I finally set a target spot to make the lamp actually provide the lighting for the scene. I adjusted the intensity & falloff to create the required lighting.

I will now create some objects on the floor of the scene that will provide obstacles that my character will interact with at the beginning of the animation.


Sack Model Development - 1

After creating my reference images I began modelling.  I started by creating a box which would form the body of the character, I then extruded out the polygons for the limbs and head. I moved the vertices to create the shapes I wanted. The model was kept as simple as possible so that when i came to the skinning stage the task would not be too difficult.